
Herbal Soap Making: A Step-by-Step Guide (Lavender Soap Recipe)
Embrace the nurturing gifts of nature with our comprehensive guide to making herbal soap. If you’ve ever wondered about how you can turn your love for herbal gardening into a functional and fragrant creation, then you’re in the right place!
Our step-by-step guide will show you how to infuse the essence of your favorite herbs into homemade soap. Whether you’re an experienced DIY aficionado or a budding enthusiast, this guide will help you craft soaps that not only smell fantastic, but also contain the natural benefits of herbs. Let’s dive into the world of herbal soap making!

As an Amazon Associate I earn from qualifying purchases and sometimes recommend products from other sellers at no extra cost to you. For more details see my disclosure policy and privacy policy.
What is Herbal Soap?
Herbal soap is a type of soap infused with natural herbs. The benefits of using herbal soap are immense and go far beyond mere cleansing. Firstly, it’s packed with antioxidants and nutrients that are beneficial to the skin.
Forged & Grown — The Shop
Handpicked products chosen to fit the way we cook, grow, and create. Nothing generic — every item earns its place.
Visit the Shop


The organic herbs used in these soaps can improve skin texture, tone, and overall health. They’re also perfect for those with sensitive skin as they are less likely to cause reactions, thanks to their natural ingredients.
Many herbs used in these soaps have medicinal properties, providing relief for conditions like eczema, acne, and psoriasis. In addition, herbal soaps are environmentally friendly and cruelty-free, making them a great choice for those committed to sustainable living.
The Benefits of Making Your Own Herbal Soap
Creating your own herbal soap is not only an enjoyable and creative process, but it also offers several advantages. Firstly, it allows you to control the ingredients going into your soap. You can avoid harsh chemicals typically found in commercial soaps and opt for natural, skin-friendly alternatives. This is especially beneficial for those with specific skin sensitivities or allergies.
Secondly, it gives you the opportunity to customize your soap according to your personal preferences or needs. Whether you prefer the calming scent of lavender or the energizing aroma of peppermint, making your own herbal soap allows you to incorporate your favorite herbs, scents, and other natural ingredients.
Lastly, homemade soap is an excellent and thoughtful gift idea. It is personalized, unique, and shows the recipient that you invested time and effort into their gift. Plus, it’s an environmentally-conscious choice compared to mass-produced soaps, aligning with sustainable lifestyle practices.
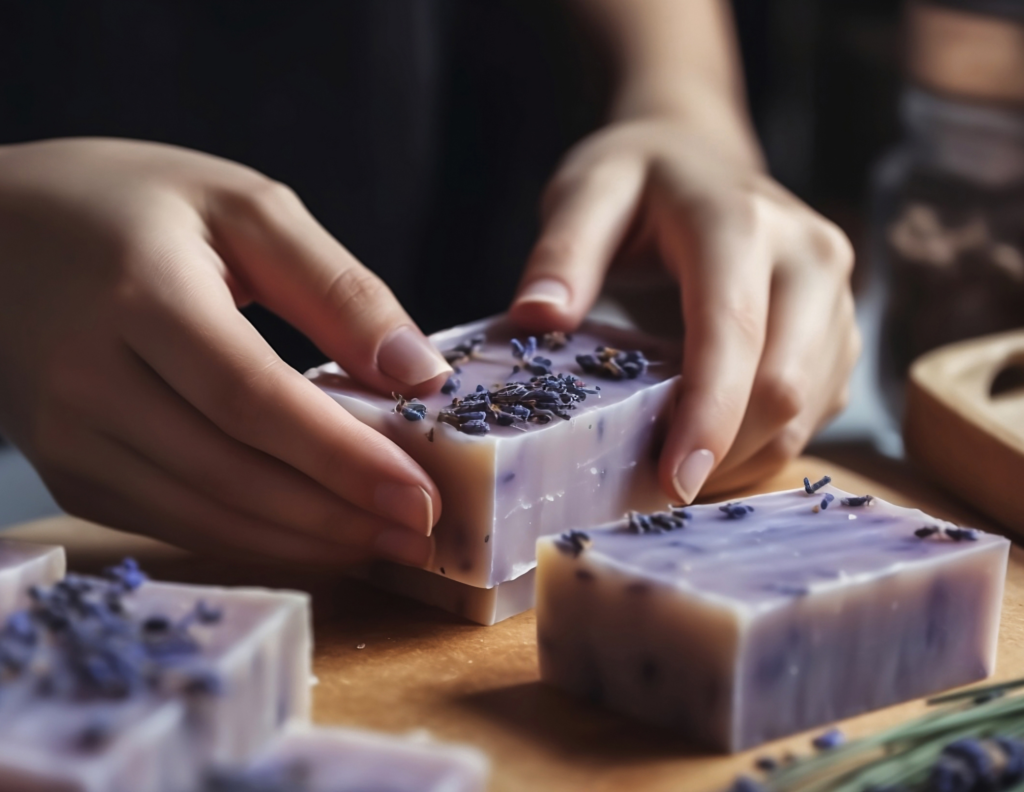
Ingredients Needed for Lavender Herbal Soap Recipe
For this lavender herbal soap recipe, you will need the following ingredients:
- Saponified oils: You’ll need a blend of saponified oils such as olive oil, coconut oil, and shea butter (around 500 grams). These oils serve as the base of your soap and provide moisturization.
- Lavender Essential Oil: Essential oils provide the fragrance for your soap. For this recipe, we’ll be using lavender essential oil (around 30 drops), which is known for its calming properties.
- Dried Lavender Flowers: Adding dried lavender flowers (1 tablespoon) to your soap not only enhances its aesthetic appeal but also adds a slight texture to the soap, providing a gentle exfoliation.
- Distilled Water: You’ll need distilled water (around 330 grams) to dissolve the lye.
- Lye (Sodium Hydroxide): Lye (around 70 grams) is a necessary ingredient in soap making. It initiates the saponification process which turns oils into soap. Always handle lye with care as it’s highly caustic in nature.
- Purple Soap Colorant: This is optional, but if you want to achieve that signature lavender color, you can add a few drops of a purple soap colorant.
Before we start, it’s crucial to note that soap-making requires care and attention. Always work in a well-ventilated area and use protective gear like gloves and eye protection, especially while working with lye.
Equipment Required
To make your homemade lavender herbal soap, here are the tools and utensils you will need:
- Soap Mold: This will give your soap its shape. Silicone molds are recommended as they are flexible and make it easier to pop out the soap once it’s hardened.
- Glass Mixing Bowls: You will need multiple bowls for preparing the soap mixture. It’s best to use glass bowls as they are non-reactive.
- Digital Kitchen Scale: To ensure accurate measurements of your ingredients, a digital kitchen scale is crucial.
- Stick Blender: This tool will help you blend the soap mixture until it reaches ‘trace’, which is the point when oils and lye water have emulsified.
- Thermometer: To ensure your oils and lye water are at the correct temperatures before mixing.
- Rubber Spatula: A rubber spatula is useful for stirring and scraping soap mixture from the sides of the bowl.
- Measuring Spoons: To measure smaller amounts of ingredients like your essential oils and colorants.
- Safety Gear: Protective goggles, gloves, and long-sleeved shirts are a must when soap making to protect your skin and eyes, especially while working with lye.
- Soap Cutter: Once your soap is hardened, you’ll need a soap cutter or a sharp knife to cut it into bars.
- Parchment Paper or Soap Wraps: For storing and gifting your finished soap bars.
Remember, safety is paramount when making soap. Always use your equipment carefully and clean everything thoroughly after use.
Step-by-Step Herbal Soap Making Process
Step 1: Prepare Your Work Area
Before you begin, ensure your work area is clean and free from clutter. Lay out all your ingredients and equipment within easy reach. Wear your safety gear – gloves, goggles, and a long-sleeved shirt.
Step 2: Measure Your Ingredients
Using your digital kitchen scale, accurately measure out your saponified oils, distilled water, lye, essential oils, and dried lavender flowers.
Step 3: Mix the Lye and Water
In one of your glass mixing bowls, slowly add the lye to the distilled water (NEVER the other way around) while stirring gently until it’s fully dissolved. The mixture will heat up and produce fumes, so be sure to do this in a well-ventilated area and avoid inhaling the fumes. Allow the lye solution to cool down to approximately 110°F (43°C).
Step 4: Heat Your Oils
While your lye solution is cooling, heat your saponified oils in your second bowl until they reach a similar temperature to the lye solution, around 110°F (43°C).

Step 5: Combine the Lye Solution and Oils
Once both your lye solution and oils are around the same temperature, slowly pour the lye solution into your oil mixture while stirring gently.
Step 6: Blend to ‘Trace’
Use your stick blender to blend the mixture in short bursts until it thickens to a ‘trace’, which is when the soap leaves a visible trail or ‘trace’ on the surface of the mixture.
Step 7: Add Extras
Now, add your lavender essential oil, dried lavender flowers, and soap colorant (if using) to the soap mixture and stir well to ensure they are evenly distributed.
Step 8: Pour into Mold
Pour your soap mixture into your soap mold. Tap the mold gently on your work surface to ensure the soap is evenly distributed and to remove any air bubbles.

Step 9: Let It Rest
Cover your mold with a towel and let it rest for 24 hours. During this time, the soap will undergo a process called ‘gel phase’ where it heats up and then slowly cools down.
Step 10: Unmold and Cut
After 24 to 48 hours, check your soap. If it’s firm to the touch, it’s ready to be unmolded. If not, let it sit for another day or so. Once you’ve unmolded your soap, use a soap cutter or sharp knife to cut it into bars.

Step 11: Cure Your Soap
Place your soap bars on a rack or tray and leave them in a cool, dry place to cure for 4 to 6 weeks. This process allows the water to evaporate, resulting in a harder, longer-lasting bar of soap.
Step 12: Enjoy!
After curing, your homemade lavender herbal soap is ready to use. Enjoy the luxurious lather and calming scent. Remember to keep the soap in a well-drained soap dish to extend its life, and store unused soap bars in a cool, dry place. Happy bathing!
Safety Precautions
While making soap at home can be a rewarding experience, it is essential to be mindful of the following safety precautions:
- Use of Lye: Lye, or sodium hydroxide, is a caustic substance that can cause burns or injury if mishandled. Always add lye to water (never water to lye) and avoid direct skin contact.
- Proper Ventilation: The process of mixing lye and water generates heat and can release fumes. Ensure you are working in a well-ventilated area and avoid inhaling the fumes.
- Protective Gear: Always wear protective gear, including gloves, goggles, and a long-sleeved shirt, to protect your skin and eyes from potential splatters or spills.
- Accurate Measurement: Accurate measurement of ingredients is crucial in soap-making. Incorrect ratios can lead to soap that’s too harsh, or even dangerous.
- Cleanliness: Keep your work area clean to avoid contamination, and always clean your tools thoroughly after use.
- Storage: Once your soap is made, store it properly. Freshly made soap needs to cure in a cool, dry place for several weeks. Keep soap in a well-drained dish between uses to extend its life.
Remember, safety first!
Storing and Using the Herbal Soap
Guidelines for Storing and Using Your Herbal Soap
Proper storage is key to extending the life of your homemade herbal soap.
Storage Before Use: After your soap has gone through the curing process, it’s essential to store it correctly. Keep your soap bars in a cool, dry place, away from direct sunlight and excessive heat. An ideal location could be a linen closet or a drawer. This helps the soap continue to harden, making it last longer.
Storage Between Uses: Between uses, your soap bar should be kept dry. Invest in a good-quality soap dish that drains water away and keeps your soap from sitting in moisture. This will prevent the soap from becoming soft and dissolving prematurely.
During Use: When using your homemade herbal soap, remember that a little goes a long way. You do not need to lather up a lot to clean your skin effectively. Simply rub the soap bar between your hands with a little water, lather up and rinse.
Enjoy the natural, fragrant, and skin-nourishing benefits of your homemade soap!
Conclusion
In conclusion, crafting your own herbal soap from scratch can be an immensely satisfying endeavor. This detailed step-by-step guide has walked you through the essentials from preparing your work area, measuring and mixing your ingredients, to the curing and storage of your soap bars.
The process, while requiring some precision and care, rewards you with a product that is not only natural and beneficial to your skin, but also personalized to your scent preference. And the best part? You’ve made it yourself!
So why not give it a try? Get your hands on some herbs, lye, essential oils, and begin your soap-making journey. Not only will you unlock a new skill, but you will also have a newfound appreciation for the process behind each bar of soap you use in the future. Don’t forget to share your experience and perhaps even your unique variations on the recipe! Happy soap-making!


