Making Herbal Infused Oils at Home: A Safety-First Guide
Herbal infused oils sit right at the heart of the home apothecary tradition. Whether you’re planning to drizzle a fragrant rosemary oil over roasted vegetables or blend a soothing lavender oil into a body salve, making your own feels like magic — especially when you grow the herbs yourself.
But there’s a catch: infused oils are genuinely satisfying to make and genuinely dangerous to make badly. The risk of botulism from improperly prepared culinary oils is real, and it’s not talked about enough in the increasingly popular world of herbal DIY. This guide will walk you through everything from choosing your carrier oil to labelling your finished product — with safety baked in at every step, not bolted on as an afterthought.
As an Amazon Associate I earn from qualifying purchases and sometimes recommend products from other sellers at no extra cost to you. For more details see my disclosure policy and privacy policy.
Hot vs Cold Infusion: Which Method Should You Use?
The method you choose for infusing your oil will depend on what you’re making it for, how quickly you need it, and how hands-on you want the process to be. Both hot and cold infusion produce beautiful results, but they work in quite different ways.
Forged & Grown — The Shop
Handpicked products chosen to fit the way we cook, grow, and create. Nothing generic — every item earns its place.
Visit the Shop


Cold Infusion (Sun Infusion)
Cold infusion is the traditional method, and it’s the one most often romanticised in herbal literature. You pack dried herbs into a jar, cover them with oil, seal it, and leave it in a warm, sunny spot — typically a south-facing windowsill — for two to six weeks. The slow process gently draws out the fat-soluble compounds from the plant material without any risk of overheating delicate constituents.
The most important rule here is that your herbs must be completely dry before they go into the oil. Any moisture creates the perfect environment for mould and bacterial growth, including Clostridium botulinum. Fresh herbs off the plant contain significant water — we’ll cover this in detail in the safety section below. Cold infusion is an excellent choice for flower-based oils like calendula and lavender where you want a gentle, nutrient-rich result.
- Works best with: dried flowers, dried roots, dried aromatic herbs
- Typical timescale: 2–6 weeks
- Best for: skincare and topical applications
- Equipment: a sterilised glass jar, a fine mesh strainer or muslin cloth
Hot Infusion
Hot infusion fast-tracks the process to a matter of hours. You can use a slow cooker, a bain-marie (double boiler), or even a dehydrator with a jar tray. The gentle heat accelerates the extraction of plant compounds, making it a practical choice when you don’t want to wait weeks. It’s also the method many herbalists prefer for tougher plant materials like roots, seeds, and bark, where prolonged heat helps break down the cell walls.
The key word is gentle. You’re aiming for a temperature of around 40–60°C (104–140°F) — warm enough to aid extraction but well below the temperature that would degrade heat-sensitive compounds or, for culinary oils, start to affect the oil’s smoke point and stability. A slow cooker set to its lowest setting works well, as does a bain-marie where you maintain a very gentle simmer in the outer pot.
- Works best with: dried herbs, roots, seeds, any herb when you need the oil sooner
- Typical timescale: 4–8 hours on low heat
- Best for: both culinary and topical applications
- Equipment: slow cooker or bain-marie, thermometer, strainer
Which Method Is “Better”?
Neither — they serve different purposes. Many herbalists prefer cold infusion for delicate flowers and skin-focused preparations where they want to preserve volatile aromatic compounds. Hot infusion is the practical workhorse when time is short or you’re working with materials that need more coaxing. For culinary oils in particular, the hot method also allows you to quickly confirm the oil is fully dry and herb-free before bottling, which matters for shelf stability and food safety.
Choosing Your Carrier Oil
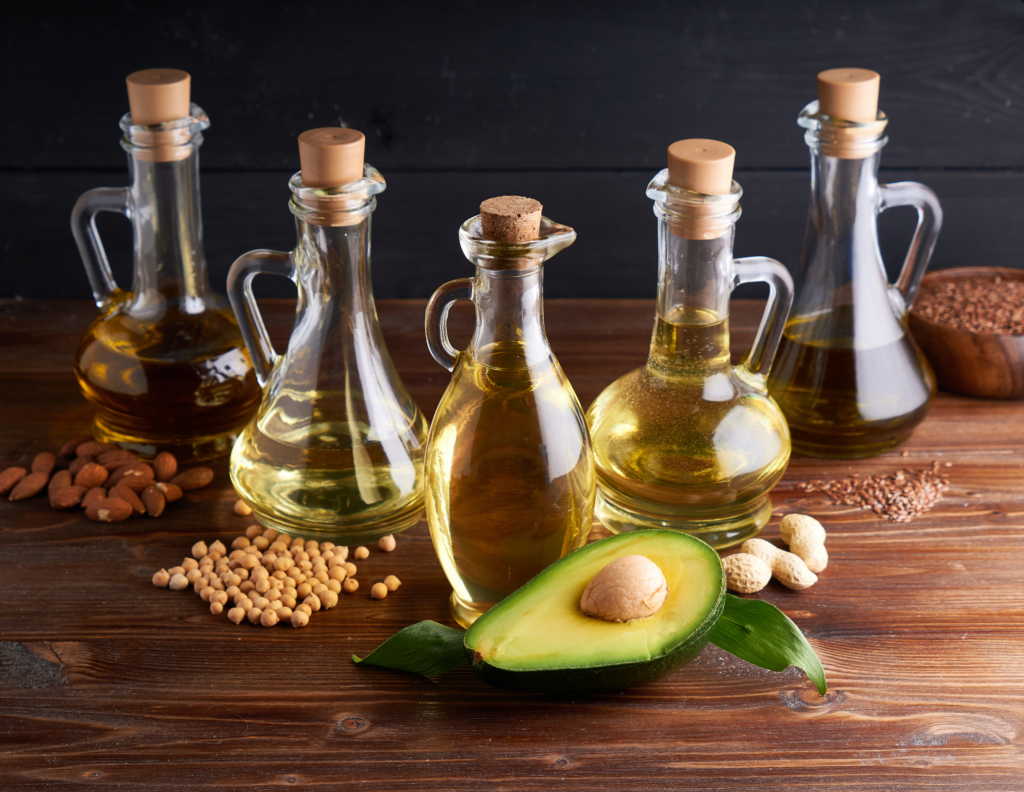
The oil you choose is the foundation of your infusion. It affects the shelf life, the feel on the skin, the flavour (for culinary versions), and how well the finished product performs in use. There’s no single “best” carrier oil — there’s only the right one for the job.
For Culinary Infused Oils
Extra virgin olive oil is the classic choice for culinary herb-infused oils. It has a rich flavour that complements Mediterranean herbs beautifully, a reasonable shelf life of around 18–24 months unopened, and it’s widely available at good quality. As you’ll know from the basil olive oil guide, it’s a natural pairing with fresh and dried herb flavours alike.
Light olive oil or extra light olive oil has a more neutral flavour profile, making it better suited for delicate herbs where you don’t want the olive notes to compete. Good alternatives for culinary use include sunflower oil, avocado oil, and grapeseed oil, all of which have mild flavours and reasonable stability.
Avoid oils with a very short shelf life — flaxseed oil and hemp seed oil go rancid quickly and won’t hold up well in an infused product, especially once you’ve opened it for daily kitchen use.
For Topical and Skincare Oils
The choice expands considerably for topical applications, and different oils offer different skin benefits:
- Sweet almond oil — light, absorbs well, gentle enough for sensitive skin
- Jojoba oil — technically a liquid wax, extremely shelf-stable, close to the skin’s natural sebum
- Fractionated coconut oil — stays liquid at room temperature, lightweight, long shelf life
- Sunflower oil — affordable, high in vitamin E, a good base for most herbal salves and balms
- Rosehip oil — rich in essential fatty acids, excellent for a finishing skin oil, but short shelf life so best used in small batches
For most beginners making a general-purpose herbal body oil or salve base, sweet almond oil or sunflower oil are excellent starting points. They’re affordable, widely available, and work beautifully with the classic apothecary herbs.
Shelf Life Considerations for Carrier Oils
It’s worth checking the best-before date on your carrier oil before you start. Infusing an oil that’s already close to or past its best-before date will result in a rancid product much sooner than expected. Store your carrier oils in a cool, dark place, and once infused, the finished product will generally have a shelf life equal to or slightly shorter than the carrier oil alone — more on this in the storage section.
The 5 Most Versatile Herbs for Home Infusions
You could technically infuse almost any dried herb into oil, but some herbs are far better suited to the process than others. These five deliver reliably excellent results, have well-established safety profiles, and between them cover every major use case — culinary, skincare, relaxation, and first aid.
1. Rosemary (Salvia rosmarinus)
Rosemary is the workhorse of herbal infused oils and arguably the most versatile of the five. A rosemary-infused olive oil is a kitchen essential — gorgeous drizzled over roasted vegetables, used as a bread dip, or brushed over chicken before roasting. You’ll find the full step-by-step process in the rosemary infused oil tutorial.
Beyond the kitchen, rosemary oil is a popular scalp and hair treatment — rosemary has been studied for its potential to support hair growth, and rosemary shampoo has become a mainstream wellness staple. The herb is rich in antioxidants and has antimicrobial properties that make it a strong candidate for both culinary preservation and skincare. Dried rosemary works well for both cold and hot infusion methods.
Safety note: Rosemary is generally well tolerated, but avoid using concentrated rosemary oil during pregnancy and consult your GP if you have epilepsy, as high doses of rosemary have historically been associated with convulsant activity. For culinary use in normal food quantities, it presents no concern.
2. Calendula (Calendula officinalis)
Calendula is the quintessential skin-care herb, and it’s where many home herbalists start their infused oil journey. The bright orange and yellow petals contain flavonoids, triterpenes, and other compounds with well-documented anti-inflammatory and wound-healing properties. A calendula-infused oil forms the base of countless balms, salves, and body oils.
Calendula is one of the few herbs that genuinely benefits from cold infusion. The petals are delicate, and a slow six-week sun infusion in a light carrier oil like sweet almond or sunflower oil produces a beautifully golden, skin-nourishing result. It’s also one of the safer herbs for use on sensitive skin and, with appropriate care, around children — though you should always patch test any new topical product.
Safety note: Calendula is in the Asteraceae (daisy) family. If you have a known allergy to plants in this family — including ragweed, chrysanthemums, or daisies — you may react to calendula. Patch test before wider use.
3. Lavender (Lavandula angustifolia)
Lavender-infused oil is a relaxation classic. It’s a natural fit for massage oils, bath oils, and body moisturisers, and its gentle floral scent makes the finished product a pleasure to use. Lavender pairs beautifully with the cold infusion method — though the volatile aromatic compounds that give lavender its scent are somewhat heat-sensitive, so if you do use the hot method, keep the temperature low and the time short.
The culinary case for lavender oil is more limited but real — lavender works in small quantities with honey, lemon, and in baked goods. If you’re making a culinary lavender oil, go very easy on quantities; lavender can quickly tip from fragrant to soapy in food.
Safety note: Avoid using lavender oil topically in young children without professional guidance, as there is limited evidence suggesting that topical lavender oil may have hormonal effects in prepubescent boys. As always with topical herbal preparations, keep away from eyes and discontinue use if irritation occurs.
4. Thyme (Thymus vulgaris)
Thyme is one of the most antimicrobial herbs available to the home herbalist, thanks largely to its high thymol and carvacrol content. A thyme-infused oil is a genuinely useful addition to your kitchen — excellent in dressings, marinades, and used to finish dishes where you want an earthy, slightly medicinal herby note. It also has a long history as a topical treatment for minor cuts and skin infections.
Thyme works well with both hot and cold infusion, though the hot method tends to produce a more robust, fuller-flavoured result for culinary use. It pairs naturally with olive oil and complements garlic, lemon, and other Mediterranean flavours. If you’re building out your culinary herb oil range, thyme is an excellent companion to rosemary.
Safety note: Thyme essential oil is very different from a gently thyme-infused carrier oil — do not confuse the two. The infused oil covered here is mild and safe for most culinary and topical uses. People taking blood thinners should use thyme medicinally only under professional guidance, as it may have anticoagulant activity in large amounts.
5. Mint (Mentha species)
Mint-infused oil occupies a slightly different space from the others on this list — it’s primarily a culinary and sensory herb in infused oil form rather than a skincare staple. A peppermint or spearmint-infused oil works well in dressings, drizzled over desserts, or as part of a herby yoghurt sauce. The cooling sensation of menthol also makes mint oil a candidate for sore muscle massage blends when used in a carrier oil at appropriate dilution.
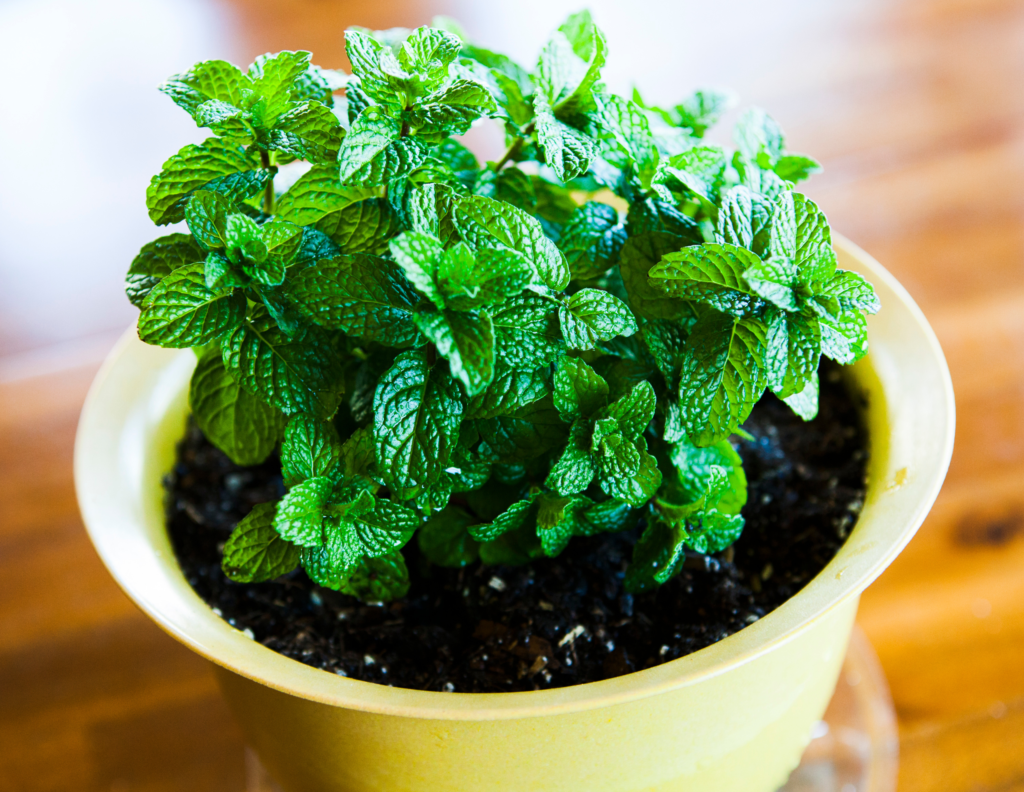
If you’ve been exploring the mint family and its many uses, an infused oil is a logical next step. Peppermint tends toward culinary and cooling applications, while spearmint produces a sweeter, gentler result that works particularly well in sweet dishes and drinks.
Safety note: Peppermint oil should not be applied near the face of infants or young children — menthol can cause respiratory distress. For adults, mint-infused oils are generally safe, but people with GERD (gastro-oesophageal reflux) may find that topical peppermint near the abdomen exacerbates symptoms.
Botulism Safety: What You Actually Need to Know
This section isn’t here to scare you off making infused oils — it’s here so you can make them confidently, knowing you’ve taken the right precautions. Botulism is rare, but cases linked to improperly prepared garlic and herb oils do occur, and home infused oils are a documented source of risk when made without proper care.
Why Infused Oils Can Be Dangerous
Clostridium botulinum is an anaerobic bacterium — meaning it thrives in environments without oxygen. Oil is an oxygen-free environment. If fresh herbs, garlic, or any moist plant material is submerged in oil and stored at room temperature, you create near-perfect conditions for the bacterium to produce its toxin.
The risk is specifically associated with:
- Fresh herbs (not dried) submerged in oil
- Garlic in oil stored at room temperature (this is the highest-risk scenario)
- Any oil infusion containing moisture stored without refrigeration
Dried herbs — properly dried until crisp and containing less than 10% moisture — do not carry this risk in the same way, because the water activity is too low to support bacterial growth.
The Rules for Safe Culinary Infused Oils
Follow these guidelines and you remove the serious risk:
- Only use fully dried herbs for any infused oil you plan to store at room temperature
- Strain out all plant material before storage — leaving herbs in the oil accelerates both spoilage and the theoretical risk window
- Refrigerate any oil made with fresh herbs and use within 1–2 weeks
- Never store garlic in oil at room temperature — if you want garlic-infused oil, either use a commercial product (which is acidified), make small batches for immediate use, or freeze it
- Heat-treat fresh herb oils at 82°C (180°F) for 10 minutes if you want longer refrigerated storage — this destroys botulinum spores
- When in doubt, discard — botulism toxin is odourless and colourless, so you cannot tell by smell or appearance whether an oil is unsafe
For topical oils — those used on skin only, not consumed — the botulism risk is not relevant. Focus your safety attention on culinary oils.
A Note on “Wilting” Fresh Herbs
Some recipes suggest wilting or pre-drying fresh herbs on a tray for 24–48 hours before using them in oil. This removes some surface moisture but does not make the herbs safe for room-temperature culinary oil storage in the way that proper drying does. If you use wilted-but-not-fully-dried herbs in a culinary oil, treat it as a fresh herb oil: refrigerate it and use it within a week.
Culinary vs Topical: Different Goals, Different Choices
It’s worth being explicit about this because a lot of general herbal oil guides blur the line — and what’s ideal for your skin may not be what you want to pour over your dinner.
Culinary infused oils are all about flavour. You want a carrier oil with a complementary taste profile, good heat stability if you plan to cook with the oil (olive oil, avocado oil), and clean, food-safe equipment throughout. The key safety concern is the botulism risk covered above. Dried herbs perform better than fresh for storage; fresh herbs give more vibrant flavour but require refrigeration and prompt use.
Topical infused oils are about delivering plant compounds to the skin. Here, carrier oil choice is guided by skin type and absorption rate, the herb’s known skin benefits, and the intended final product — a massage oil, a salve base, a hair treatment. Food safety is irrelevant here (though you should still use clean equipment and properly dried herbs to avoid mould). The shelf life concern is more about oil oxidation — a rancid oil applied to skin can cause irritation.
You can of course have dual-purpose oils — a rosemary olive oil is equally at home in the kitchen and as a scalp treatment. But be intentional about which goal is primary, because it will influence your method, your carrier oil, and your storage approach.
Labelling and Storage
A well-labelled, properly stored herbal oil is a finished product. An unlabelled jar lurking at the back of a shelf is a mystery and potentially a waste of good herbs and good oil.
What to Put on Your Label
Every bottle of infused oil, culinary or topical, should be labelled with:
- The herb(s) used — be specific (e.g., dried rosemary, Salvia rosmarinus)
- The carrier oil — type and approximate quantity
- The infusion method — hot or cold
- The date made
- The best-before date — typically 6–12 months for topical oils, up to 12 months for dried-herb culinary oils
- For topical oils: “For external use only” and any relevant safety notes (e.g., “Not for use in pregnancy”)
If you’re giving infused oils as gifts — and they make wonderful ones — include a small card with usage guidance and the key safety notes. This is both thoughtful and responsible.
Storage Best Practices
- Store all infused oils in dark glass bottles — amber or cobalt blue are ideal. Light degrades both the carrier oil and the plant compounds.
- Keep in a cool, dark location — a kitchen cupboard away from the cooker is fine for culinary oils; a dedicated shelf in a cool room is ideal for skincare oils.
- Refrigerate oils made with fresh herbs and plan to use them within 1–2 weeks.
- Dried herb culinary oils at room temperature are stable for 6–12 months if well-strained and stored correctly.
- Add a natural antioxidant — a few drops of vitamin E oil (tocopherol) or rosemary extract (not the same as rosemary essential oil) to topical oils to extend shelf life by slowing oxidation.
Signs Your Oil Has Gone Off
Rancid oil has a distinctive unpleasant smell — often described as crayons, paint, or old cooking fat. Any oil that smells off, looks cloudy when it wasn’t previously, or has visible mould should be discarded. For culinary oils, if there is any doubt, do not taste and do not use. For topical oils, do not apply a rancid oil to skin, as oxidised oils can cause irritation and may worsen rather than help skin conditions.
Frequently Asked Questions
Can I use fresh herbs from my garden? You can, but with important caveats depending on what you’re making. For topical oils, fresh herbs can work if you wilt them thoroughly first to reduce moisture, then monitor the oil carefully for any signs of mould. For culinary oils intended for storage at room temperature, stick to properly dried herbs only. If you use fresh herbs in a culinary oil, refrigerate it and use within a week or two.
How do I know if my herbs are dry enough? Properly dried herbs should feel crisp and papery, not flexible or leathery. They should crumble easily when rubbed between your fingers. If they bend without breaking, they need more drying time. You can dry herbs at home by hanging bunches in a warm, well-ventilated space for two to three weeks, or in an oven at the lowest setting (around 40°C/100°F) with the door slightly ajar for several hours. Our herb preservation guide covers drying methods in detail.
How much herb do I use relative to oil? A common starting ratio is 1 part dried herb to 5 parts oil by weight (20% herb). For very aromatic herbs like thyme and rosemary, you can go lighter — 1:8 — and still get a strong result. For more subtle herbs, a 1:5 or even 1:4 ratio works better. There’s no single right answer; it depends on the herb and your intended use.
Can I reuse the infused herb? No — once you’ve strained your oil, the spent herbs go into the compost. They’ve given up their fat-soluble compounds and have no further use in oil infusion. Dried spent herbs are not suitable for culinary use either.
Can I infuse multiple herbs together? Absolutely. Blended herb oils are wonderful — rosemary and thyme together make a superb culinary oil, and lavender and calendula are a classic combination for a gentle skin oil. Just make sure all herbs are equally well-dried before combining, and consider whether their shelf lives are compatible.
What’s the difference between an infused oil and an essential oil? This is an important distinction. An infused oil (also called a macerated oil or herbal oil) is made by steeping herbs in a carrier oil — the fat-soluble compounds from the herb are extracted into the oil, producing a mild, general-purpose product. An essential oil is a highly concentrated volatile aromatic compound extracted by steam distillation or cold pressing, requiring significant quantities of plant material and specialist equipment. Essential oils are potent and require careful dilution — they are not the same as infused oils and the two should not be used interchangeably.
Are infused oils safe during pregnancy? Some are, some aren’t. Lavender, calendula, and chamomile-infused oils are generally considered safe for external use during pregnancy. Rosemary, thyme, and peppermint oils should be used with caution or avoided, particularly in the first trimester, and should not be used internally. Always consult your midwife or GP before using any herbal preparation during pregnancy.
How long does the infusion process actually take? Hot infusion: 4–8 hours. Cold infusion: 2–6 weeks. There’s no reliable shortcut to the cold infusion timeline — the slow, gentle extraction genuinely produces a different (and for delicate flowers, often better) result than heat. If you need oil sooner, use the hot method.
Bringing It All Together
Making herbal infused oils at home is one of the most satisfying things you can do with your herb garden. There’s a direct line between the herbs you grow on your windowsill or balcony and a beautiful, purposeful product — a rosemary oil for cooking, a calendula salve base for skin, a lavender body oil for unwinding after a long week.
The safety dimension isn’t complicated once you understand it. Dry your herbs properly. Use clean equipment. Label everything. Refrigerate oils made with fresh material. With those habits in place, you’re well equipped to build out a small collection of infused oils that genuinely earns its shelf space.
This post is part of the Green Herb Guru starter apothecary series. As your confidence grows, you’ll find that infused oils open the door to a whole range of next-step projects — herbal salves, balms, hair treatments, and beyond. For now, pick one herb, choose your carrier oil, and start with a small batch. The process teaches you more than any guide can.
As always, herbal preparations are not a substitute for medical treatment. If you have a health condition, are pregnant, or are taking medication, consult your GP or a qualified herbalist before adding herbal preparations to your routine.
Continue Your Journey
- How to Make Homemade Rosemary Infused Oil — step-by-step tutorial for one of the most popular culinary and wellness oils
- How to Make Basil-Infused Olive Oil at Home — a classic kitchen staple with a foolproof method
- Viral Herb-Preservation Hacks: Save Your Harvest Before Frost Hits — drying, freezing, and storing your herbs for year-round use
- Your Complete Beginner’s Apothecary Guide — the pillar post for the full starter apothecary series
- Beginner’s Guide to Everyday Medicinal Herbs — get to know the herbs before you infuse them
Tried making your own herbal infused oil? Drop a comment below and let us know which herb you started with — and whether you went for hot or cold infusion. We’d love to hear how it turned out.
Want more herb growing and wellness guides straight to your inbox? Sign up for the Green Herb Guru newsletter and never miss a post.