DIY Herbal Salts and Sugars: Simple Wellness Additions You’ll Actually Use
There’s something quietly satisfying about turning a handful of garden herbs into something you’ll reach for every single day. Herbal salts and sugars sit right at that sweet spot where practical kitchen craft meets gentle wellness — no fancy equipment, no complicated steps, and genuinely useful results. If you’ve been growing herbs and wondering what to do beyond the usual bunch-and-hang routine, this is a great place to start.
These blends have been used for centuries as a way to preserve herbs and make everyday meals more aromatic and nourishing. Today they’re having a well-deserved moment, and once you’ve made your first batch, you’ll wonder why you ever bought plain salt at the shop.
As an Amazon Associate I earn from qualifying purchases and sometimes recommend products from other sellers at no extra cost to you. For more details see my disclosure policy and privacy policy.
What Are Herbal Salts and Sugars?
At their most basic, herbal salts and sugars are blends of culinary salt or sugar with dried or fresh herbs, flowers, or spices. The salt or sugar acts as a preservative, pulling moisture from the herbs and locking in their aromatic compounds. What you end up with is a deeply flavoured seasoning that does double duty — adding flavour to food while carrying the gentle benefits of the herbs themselves.
Forged & Grown — The Shop
Handpicked products chosen to fit the way we cook, grow, and create. Nothing generic — every item earns its place.
Visit the Shop


One underappreciated bonus: when herbs share the spotlight with salt, you naturally tend to use less sodium overall. A well-seasoned herb salt is so flavourful that a small pinch goes a long way. For anyone trying to cut back on salt without sacrificing flavour, that’s genuinely useful.
They’re also far more approachable than tinctures or capsules. There’s no measuring dropper, no bitter aftertaste, and no sense that you’re “taking something.” You’re just seasoning your food — and quietly doing something good for yourself at the same time.
Getting the Ratios Right
One of the most common questions about herbal salts is how much herb to use. The good news is there’s no single correct answer, which means there’s plenty of room to experiment based on your taste and the herbs you’re working with.
Starting Points for Dried Herbs
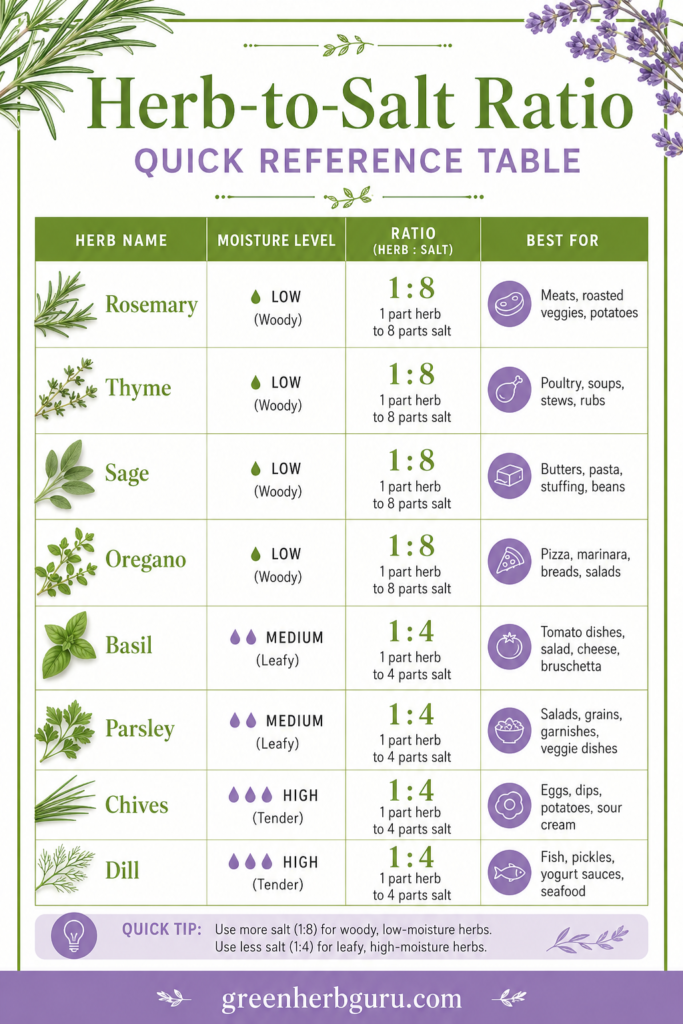
When working with fully dried herbs, a good starting point is roughly 1 part herb to 4–8 parts salt by volume — so around one tablespoon of crumbled dried herb to four to eight tablespoons of salt. The range is wide because it really does depend on how strongly aromatic your herb is.
Powerfully fragrant herbs like rosemary, thyme, and mint can easily overwhelm a blend, so start at the lower end (1:8) and adjust from there. Milder, more nutritive herbs like nettle or dandelion leaf can be used more generously since their flavour is subtler and their nutritional contribution is what you’re really after.
Working with Fresh Herbs
Fresh herbs need a different approach because they contain significant moisture that must be driven out before you seal them in a jar. Many recipes use roughly equal volumes of chopped fresh herbs and salt, spread on a baking tray, and dried at a low oven temperature before storing.
Herbal Sugars
The approach for herbal sugars follows the same logic. A ratio of 1 part aromatic herb to 4–8 parts sugar works well as a starting point. Lavender sugar, rose petal sugar, and mint sugar are all made this way — the herb infuses the sugar with its scent and flavour as it sits. Once the blend is ready, sift it through a fine mesh sieve to remove any coarser herb pieces before using.
Drying Techniques Before You Mix
Getting your herbs properly dry before mixing is the single most important step in making herbal salts and sugars that last. Any residual moisture is an invitation for mould, clumping, and a dramatically shortened shelf life. This is worth getting right.
Which Drying Method Should I Use?
A quick guide for herbal salts & sugars
Your herbs are ready to blend with salt or sugar at the ratio of 1 part herb to 4–8 parts salt. Crumble finely before measuring, then jar and label.
Bundle stems, tie loosely, and hang upside down in a warm, ventilated spot away from direct sunlight. Ready in a few days when leaves crumble easily.
Spread in a single layer. Dehydrator: 35–43°C (95–110°F). Low oven: around 100°C (210°F). Check every 30 mins until fully brittle.
Chop fresh herbs and mix with salt in a bowl. Spread on a lined baking tray and dry at 93–110°C (200–230°F) for 30–60 minutes, checking regularly. Alternatively, dry at room temperature for several days, stirring occasionally. The blend must feel completely dry before jarring.
- Leaves crumble easily between your fingers — no bending or flexing
- No soft or spongy patches anywhere in the blend
- The mixture feels dry and loose, not clumping together
- If in doubt, give it more time — under-dried herbs cause mould in the jar
Air-Drying
Air-drying is the simplest method and works beautifully for low-moisture herbs. Rosemary, oregano, marjoram, sage, and dill all dry well this way. Bundle the stems, tie them loosely, and hang them upside down in a warm, dry, well-ventilated spot away from direct sunlight. Within a few days to a week, the leaves will be crisp and crumble easily — that’s your signal they’re ready.
If you’re building your herb knowledge alongside your preservation skills, the herb preservation guide covers more techniques for saving your harvest across the seasons.
Oven or Dehydrator Drying
High-moisture herbs need a little more help. Basil, mint, and chives hold a lot of water in their leaves and are prone to moulding if air-dried too slowly. A dehydrator set to around 35–43°C (95–110°F) is ideal, but a low oven works just as well. Spread the leaves in a single layer and check every 30 minutes until they’re fully brittle and crumble between your fingers.
Drying Salt-and-Herb Blends Together
If you’re working with fresh herbs and prefer to mix first and dry after, spread the combined herb-and-salt mixture on a baking sheet and dry it at around 93–110°C (200–230°F), checking after 30–45 minutes. You can also dry it at room temperature in a warm, low-humidity space — just stir occasionally to prevent clumping. Either way, the blend needs to feel completely dry to the touch before you jar it up.
Four Starter Recipes to Try
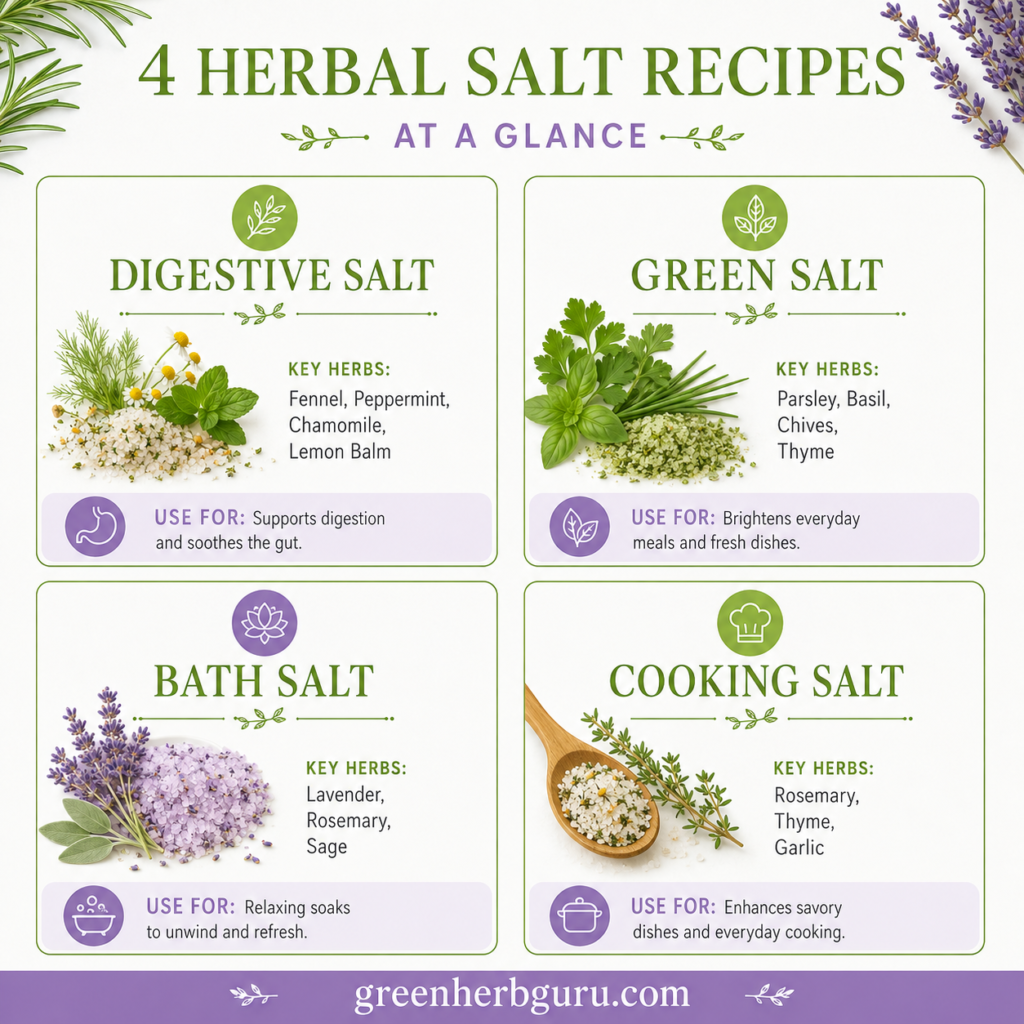
Recipe 1: Digestive Herb Salt
This one is built around carminative herbs — a fancy term for plants that help settle the digestive system by relaxing the gut and easing gas and bloating. It’s a kitchen staple that quietly earns its place on the table.
What you’ll need:
- 1 tbsp dried fennel seeds, lightly crushed
- 1 tbsp dried dill
- 1 tsp dried thyme
- 1 tsp dried orange peel
- 6–8 tbsp fine sea salt
Combine all ingredients in a bowl, mixing well to distribute the herbs evenly. If any ingredient isn’t bone-dry, spread the mixture on a baking tray and dry briefly in a low oven before jarring. Store in an airtight glass jar.
This salt shines on roasted vegetables, soups, and heavier, oily dishes where a little digestive support is welcome. Sprinkle it at the table rather than cooking with it, so the delicate aromatics don’t cook off. If you want to explore more herbs that support digestion, mint teas 101 covers many of the same plant families in depth.
Recipe 2: Mineral-Rich Green Salt
This is the one for anyone who wants to sneak a bit of extra nutrition into everyday cooking without anyone noticing. A green salt focuses on mineral-dense herbs and greens — think nettle, dandelion leaf, and similar plants that are quietly packed with iron, calcium, and trace minerals.
What you’ll need:
- 2 tsp dried nettle leaf, finely crumbled
- 1 tsp dried dandelion leaf
- 1 tsp dried parsley
- 6 tbsp fine sea salt or mineral-rich flaked sea salt
Combine thoroughly and store in a glass jar. Because nettle and dandelion have a mild, slightly green, grassy flavour, they blend easily without overpowering.
Use this salt over salads and grain bowls, on popcorn, or on roasted root vegetables. Think of it as a flavour-forward seasoning that happens to also be doing something useful. For more on essential herbs and spices worth keeping on hand, that guide is a good companion read.
Recipe 3: Relaxation Bath Salt
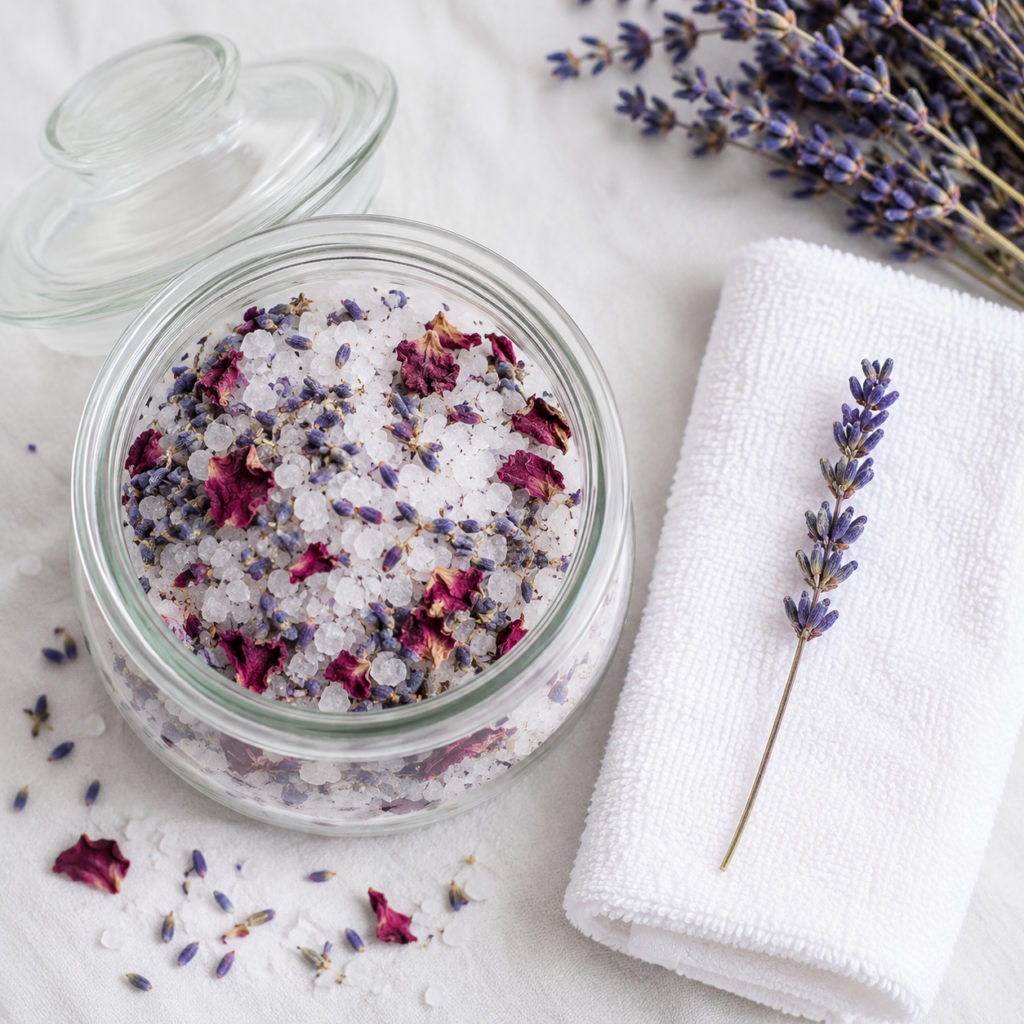
Not everything in this post is destined for the dinner table. This blend uses the same mineral-salt base but pairs it with relaxing herbs and flowers for a simple home spa ritual — no expensive products required.
What you’ll need:
- 200g Epsom salt
- 100g fine sea salt
- 2 tbsp dried lavender flowers
- 1 tbsp dried chamomile
- 1 tbsp dried rose petals
- Optional: 1 tsp sweet almond oil, a few drops of lavender essential oil
Mix everything together gently and store in a wide-necked glass jar. For the bath, add a generous handful to a muslin bag or reusable cloth pouch before dropping it into the tub — this keeps the loose flowers and petals from blocking the drain and makes cleanup much easier.
This pairs beautifully with a bedtime wind-down routine. Epsom salt is rich in magnesium, which many people absorb transdermally during a warm bath. The lavender and chamomile do the rest. If you enjoy this kind of DIY wellness approach, the herbal bath salts guide goes deeper into the method.
Recipe 4: Everyday Cooking Herb Salt
This is the one you’ll use most. A simple, versatile herb salt that works on almost everything — eggs, roasted vegetables, grilled fish, potatoes, soups — and makes a genuinely thoughtful gift.
What you’ll need:
- 1 tbsp fresh rosemary, finely chopped
- 1 tbsp fresh thyme leaves
- 1 tbsp fresh sage, finely chopped
- Zest of 1 unwaxed lemon
- 8 tbsp coarse sea salt or kosher salt
Combine the fresh herbs, lemon zest, and salt in a bowl and mix well. Spread the mixture thinly on a baking tray lined with baking paper and dry in your oven at its lowest setting — around 100°C (210°F) — for 45–60 minutes, checking regularly. Once fully dry, transfer to a glass jar.
This “house salt” is one of those small kitchen upgrades that makes a real difference to everyday cooking. It’s also endlessly adaptable — swap the sage for oregano, add a little dried chilli, or use lime zest instead of lemon to change the character entirely. The herb and spice blends guide has more inspiration for building your own flavour combinations.
Glass vs Plastic: Why Storage Containers Matter
Once your blends are made, the container you choose genuinely affects how long they stay flavourful. This isn’t overthinking it — salt and aromatic herbs are both reactive in their own ways, and the wrong container can shorten shelf life and muddy flavours.
Glass wins on almost every count. It’s non-reactive, doesn’t absorb odours, provides a stable barrier to air and moisture, and helps the essential oils in your herbs stay potent for longer. It also looks beautiful on a shelf or as a gift, which is a bonus.
Plastic containers are a less ideal choice for a few reasons:
- They can absorb strong herb aromas and retain them even after washing, which affects future batches
- They allow more air transfer over time, which degrades both the herbs and the container
- Temperature fluctuations affect plastic more than glass, which can accelerate breakdown
For long-term storage and gifting, airtight glass jars with tight-fitting lids — swing-tops, clip-tops, or standard screw-lids — are the clear choice. Small glass spice jars also work well for everyday use.
Shelf Life: How Long Will They Keep?
The honest answer is: it depends. The most important variables are how thoroughly your herbs were dried before mixing, how well the blend is stored, and which herbs you used.
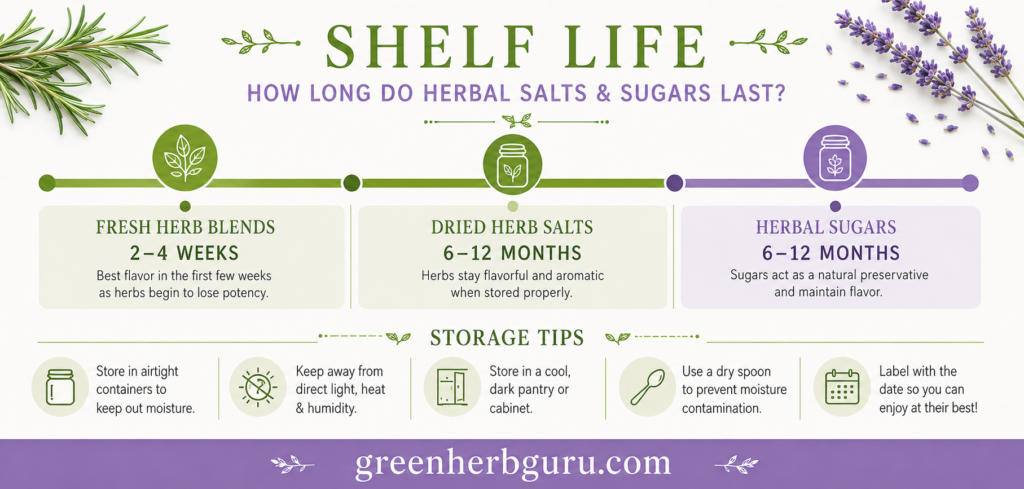
As a general guide:
- Properly dried herbal salts, made with fully dried herbs and stored in airtight glass in a cool, dark, dry spot, will hold their flavour well for 6–12 months
- Herbal sugars follow similar guidelines — as long as the herbs are completely dry, they keep well for several months away from moisture and light
- Blends made with imperfectly dried fresh herbs have a much shorter shelf life and should be used within a few weeks, with regular checks for clumping, off smells, or discoloration
A simple habit that makes a big difference: label every jar with the blend name and the date you made it. It sounds obvious, but it’s very easy to forget when you’ve made several batches at once. Discard anything that develops an off smell, visible mould, or unusual discoloration — trust your senses here. Properly made salts and sugars should smell vibrant and clean every time you open the jar.
Gift Packaging Ideas
Herbal salts and sugars make genuinely lovely gifts — they’re personal, useful, and don’t cost much to make beautifully. A few thoughtful touches go a long way.
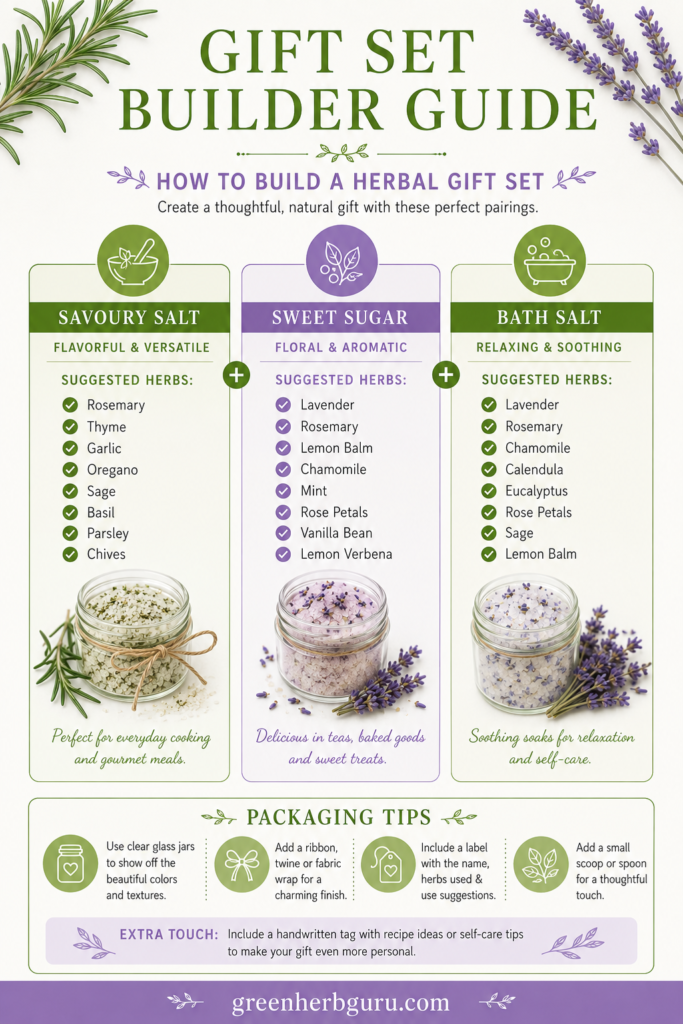
- Small glass spice jars or swing-top bottles look elegant and can be reused. Clear glass lets the colours of the herbs and flowers show through, which is part of the appeal.
- Simple labels make a real difference. Include the blend name, ingredients, date made, and a brief usage note — “Try on roasted veg or scrambled eggs” tells someone exactly what to do with it.
- Bundled sets work beautifully as gifts. Pair a savoury herb salt with a sweet herbal sugar and a relaxation bath salt in a small box or basket. It becomes a cohesive gift rather than a jar of mystery powder.
- Eco touches feel aligned with the whole ethos: tie a sprig of fresh rosemary or a cinnamon stick to the jar with natural twine, or package in recyclable card boxes.
You can also include a small recipe card so the recipient knows how to recreate the blend once they’ve used it up. A handwritten card adds a lot of warmth.
Getting Started: Your First Batch
If you’re new to herb preservation generally, herbal salts are one of the most forgiving places to begin. The method is simple, the ingredients are inexpensive, and the results are immediately useful. You don’t need specialist equipment — a bowl, a baking tray, a jar, and your herbs are genuinely all it takes.
Start with the everyday cooking herb salt if you want something you’ll use daily. Move to the digestive salt or green salt once you’re comfortable with the method. The relaxation bath salt is a lovely project for when you want to make something a bit more indulgent or gift-worthy.
The main thing to remember is this: get the herbs properly dry before you seal them in a jar. Everything else is flexible and forgiving. Proportions can be adjusted to taste, herbs can be swapped based on what you have growing, and the blends can be made as bold or as subtle as you like.
For more ideas on using fresh herbs creatively throughout the seasons, the herb-infused drinks guide and the beginners’ apothecary guide are both worth a look. And if you’re at the stage where you’re thinking about how to preserve your herb harvest more broadly, the herb preservation hacks post has plenty of techniques to explore.
Making herbal salts and sugars is one of those crafts that stays with you. Once it’s part of your kitchen rhythm, it starts to feel less like a project and more like just how you cook — and that’s exactly where it belongs.
Continue Your Journey
- Viral Herb-Preservation Hacks: Save Your Harvest Before Frost Hits — more ways to make the most of your harvest before it’s gone
- How to Make Herbal Bath Salts — a deeper look at bath salt making for home spa rituals
- How to Make Popular Herb and Spice Blends — expand your seasoning repertoire with these flavour-packed blends
- Your Complete Beginner’s Apothecary Guide — a gentle introduction to using herbs for everyday wellness
- Mint and Lemon Balm for Calm Evenings and Happy Digestion — learn more about the digestive herbs that work well in herbal salt blends
Have you made an herbal salt or sugar before? I’d love to know which herbs you used and what you made it for — drop a comment below and share your blend.
Want more ideas for making the most of your herb garden? Sign up for the Green Herb Guru newsletter and get seasonal tips, simple recipes, and DIY projects delivered straight to your inbox.


